

Home Automation using Button Switch
Home Automation using Button Switch
Aim:
The main aim of the project is to operate the component by using button switch with the help of relay module.
Components Required:
| Sr. No | Component | Quantity |
|---|---|---|
| 1 | TeBoT and cable | 1 |
| 2 | Resistor (220Ω) | 1 |
| 3 | Breadboard | 1 |
| 4 | Jumper Wires (M-M) | 3 |
| 5 | Jumper Wires (M-F) | 3 |
| 6 | LED | 1 |
| 7 | 1-Channel Relay Module | 1 |
| 8 | Rechargeable Battery (12V) | 1 |
Connection and Code Upload:
Step 1: Connect the TeBoT with your device and turn on it.
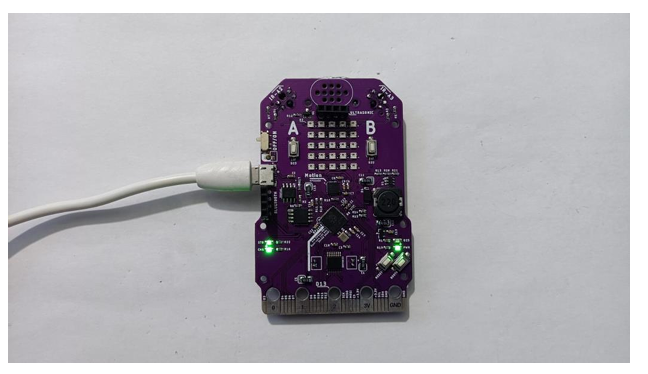
Step 2: Select the board and port, then upload the code.
Warning: If you face any issue while uploading the code, then first “OFF” the TeBoT. Next, turn “ON” the TeBoT. Press the “BOOT” button for a short time then press the “RESET” button once. Then release the “BOOT” button. You will get a drive. Then upload the code.
Step 3: Now remove USB cable from TeBoT and connect the relay module.
Relay Module ↔ TeBoT
VCC / + ↔ VCC (1st pin from right to left in Ultrasonic Port)
GND / G ↔ GND (1st pin from left to right in Ultrasonic Port)
IN ↔ Pin No 14 (2nd pin from left to right in Ultrasonic Port)
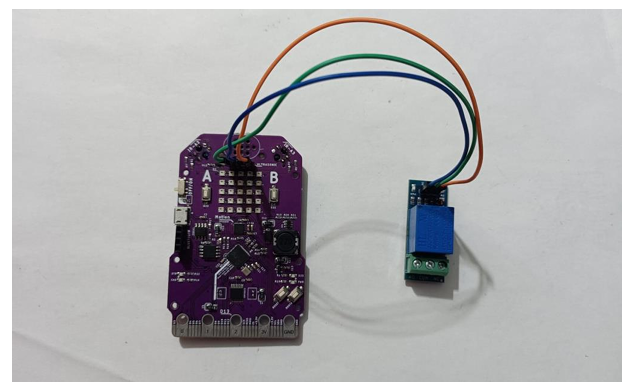
Step 4: Now connect one LED on breadboard.
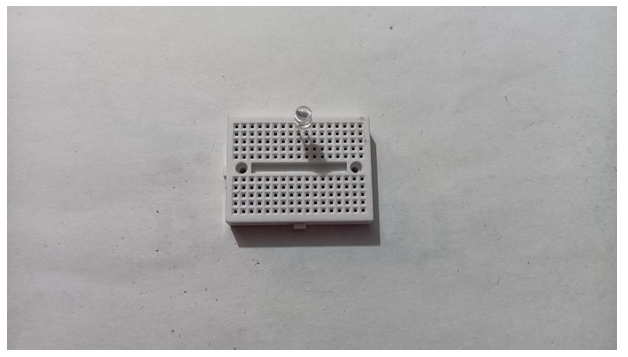
Step 5: Connect one terminal of resistor at the +VE terminal of LED and connect other terminal of resistor at any point of breadboard as shown below.
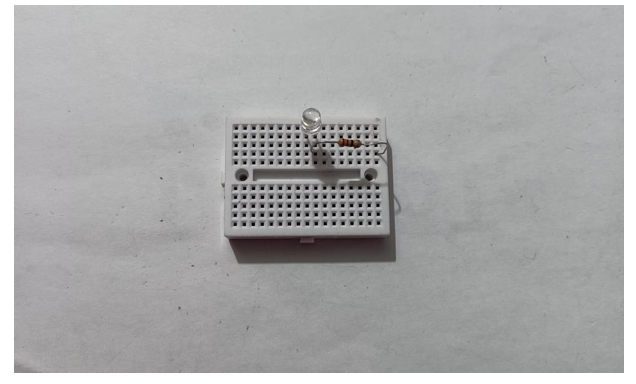
Step 6: Now connect the other end of resistor to “NC” of relay module and –VE terminal of LED with –VE of battery (Black wire). Also connect the “COM” of relay module with +VE of battery (Red Wire).
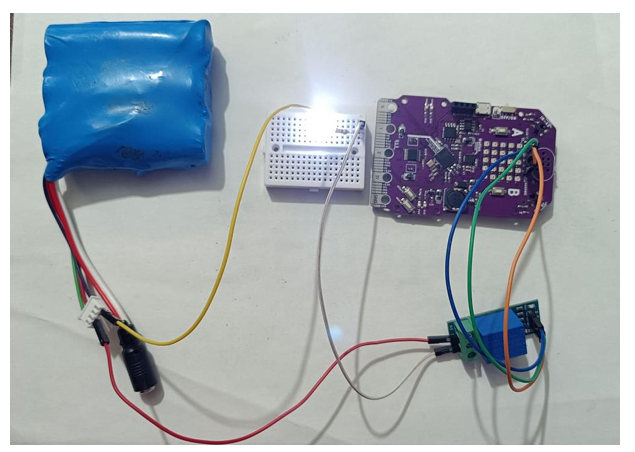
Now turn on the TeBoT. You will see that the LED will be OFF.
When you press the Button (A / D23), the light will ON and when you press the Button (A / D23) again, the light will OFF.
Conclusion: From this project we got the idea about all components, connection of those components and made the Home Automation by Button Switch.