

Temperature and Humidity Measurement
Temperature and Humidity Measurement
Aim:
The main aim of the project is to measure temperature and humidity using DHT11 on TeBoT.
Components Required:
| Sr. No | Component | Quantity |
|---|---|---|
| 1 | TeBoT and cable | 1 |
| 2 | TeBoT Connector | 1 |
| 3 | DHT11 | 1 |
| 4 | LCD_I2C | 1 |
| 5 | Jumper Cable(M-F) | 5 |
| 6 | Jumper Cable(F-F) | 2 |
Connection and Code Upload:
Step 1: Connect the TeBoT with your device and turn on it.
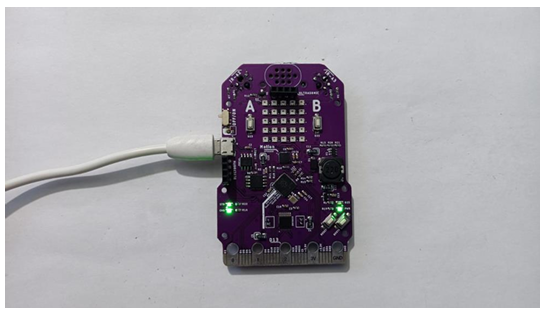
Step 2: Select the board and port, then upload the code.
Warning: If you face any issue while uploading the code, first “OFF” the TeBoT. Next, turn “ON” the TeBoT. Press the “BOOT” button for a short time then press the “RESET” button once. Then release the “BOOT” button.
You will get a drive. Then upload the code.
Step 3: Take the connector and attach on TeBoT.
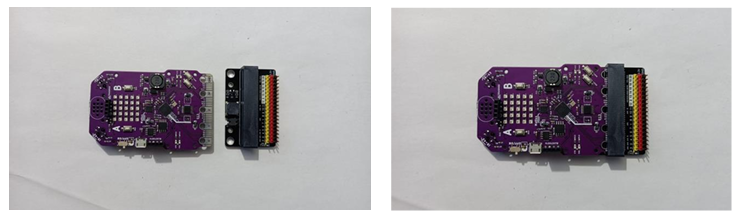
Step 4: Connect the LCD with TeBoT and connector.
| LCD_I2C | ↔ | TeBoT |
|---|---|---|
| GND | ↔ | GND (1st pin from left to right in ultrasonic port) |
| VCC | ↔ | VCC (1st pin from right to left in ultrasonic port) |
| SDA | ↔ | Pin no 4 (Connector) |
| SCL | ↔ | Pin no 5 (Connector) |
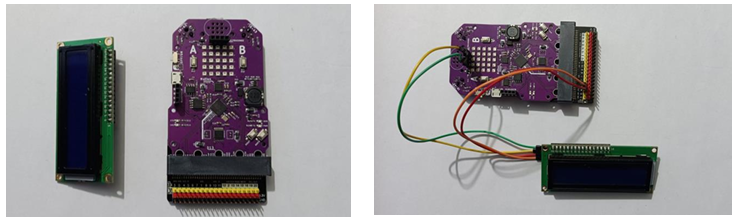
Step 5: Connect DHT11 with TeBoT.
- VCC of DHT11 with VCC (4th pin from up to down in Bluetooth port) of TeBoT.
- GND of DHT11 with GND (3rd pin from up to down in Bluetooth port) of TeBoT.
- OUT of DHT11 with Pin no 14 (2nd pin from left to right in ultrasonic port) of TeBoT.
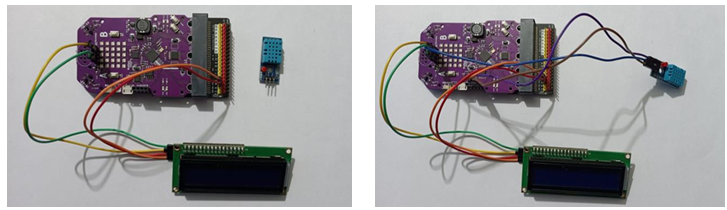
Now, turn on the TeBoT. You will see the temperature and humidity on LCD screen. If you increase the heat of room, then the temperature and humidity also change on screen.
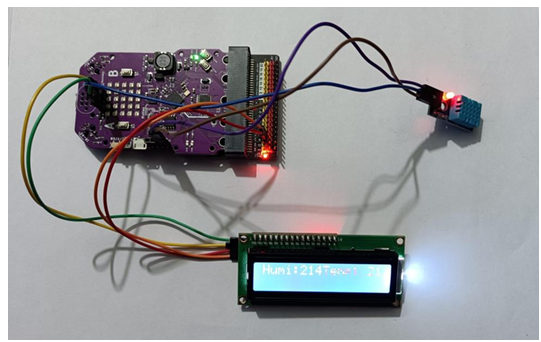
Conclusion: From this project we got the idea about all components, connection of those components and made the Temperature and Humidity Measurement.